Hey everyone!
I am so excited to write this blog post, and not just because I haven’t written one in forever! I had the opportunity to do something that I have wanted to do forever and all the stars lined up for me this year. But, before we get to the good stuff, let me back it up just a little bit.
If you don’t know, on Easter Sunday of 2020, our home was hit by an F-3 tornado. We sustained serious damage from wind and water that destroyed all the walls, ceilings, and floors of our home. Thankfully, the majority of our possessions were fine and we were safe. But, we began the long, bizarre process of an emergency pack out, cleaning, and remodel. You know, during a pandemic. I am so grateful to the ladies who came and packed my house, just as it was. There was no pre-move purge or organization. It was what it was and the packers did an incredible job. I grabbed a backpack full of craft supplies in three minutes and that was all I had for about 7 months. For the record, my office was a dumpster fire before, and it transformed into a boxed up dumpster fire when we moved back in.
These are some pictures before the tornado at the room’s cleanest for a magazine shoot!
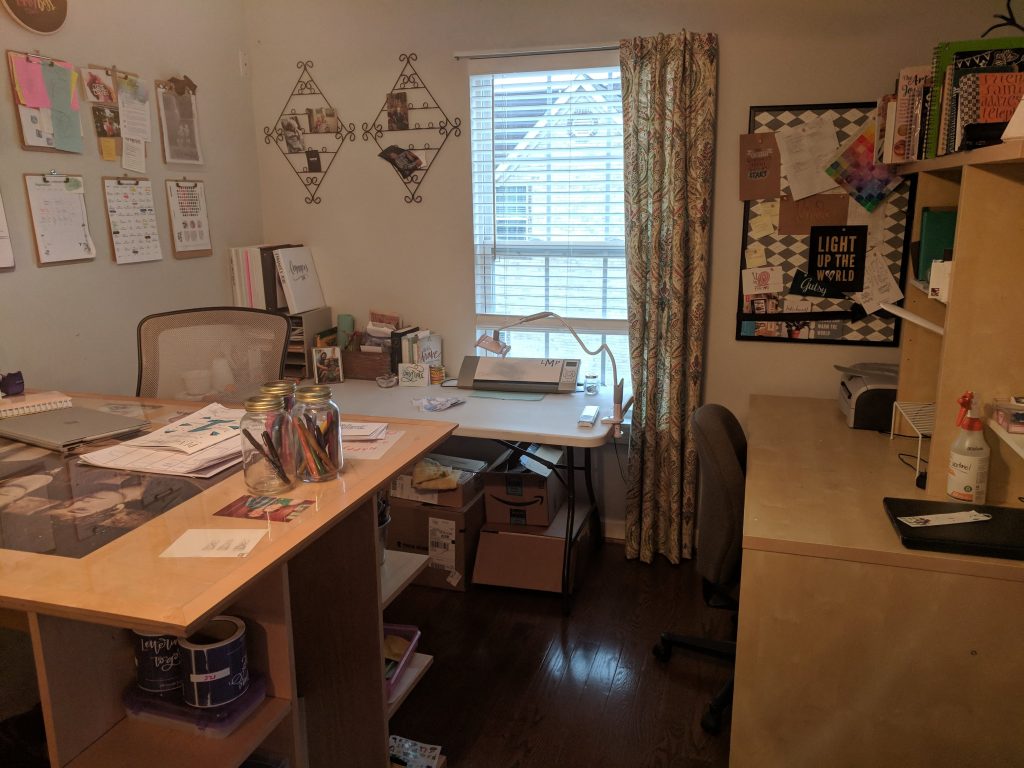
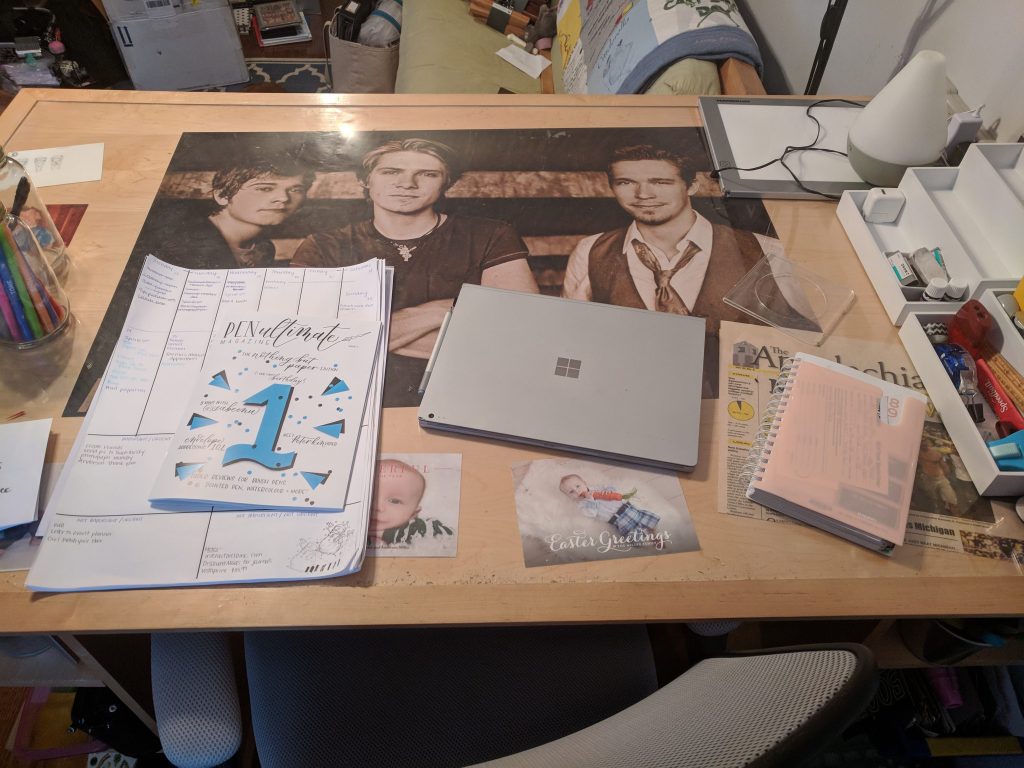

And, this is where I moved all the stuff that was lingering on the other side so I could take pictures.
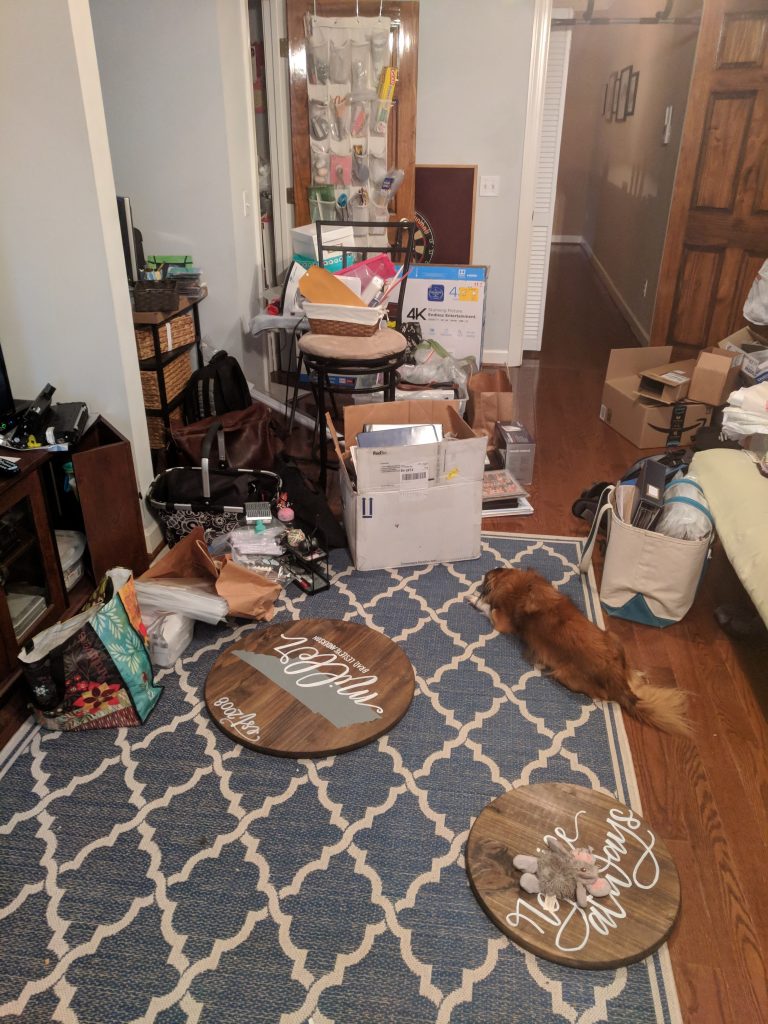
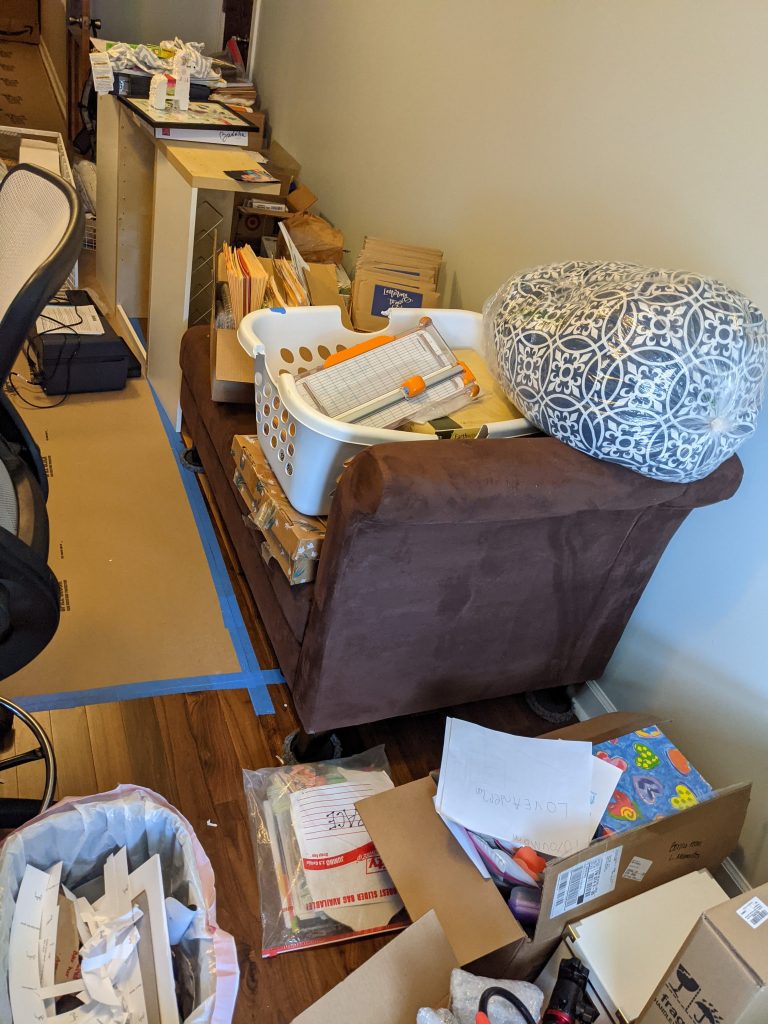
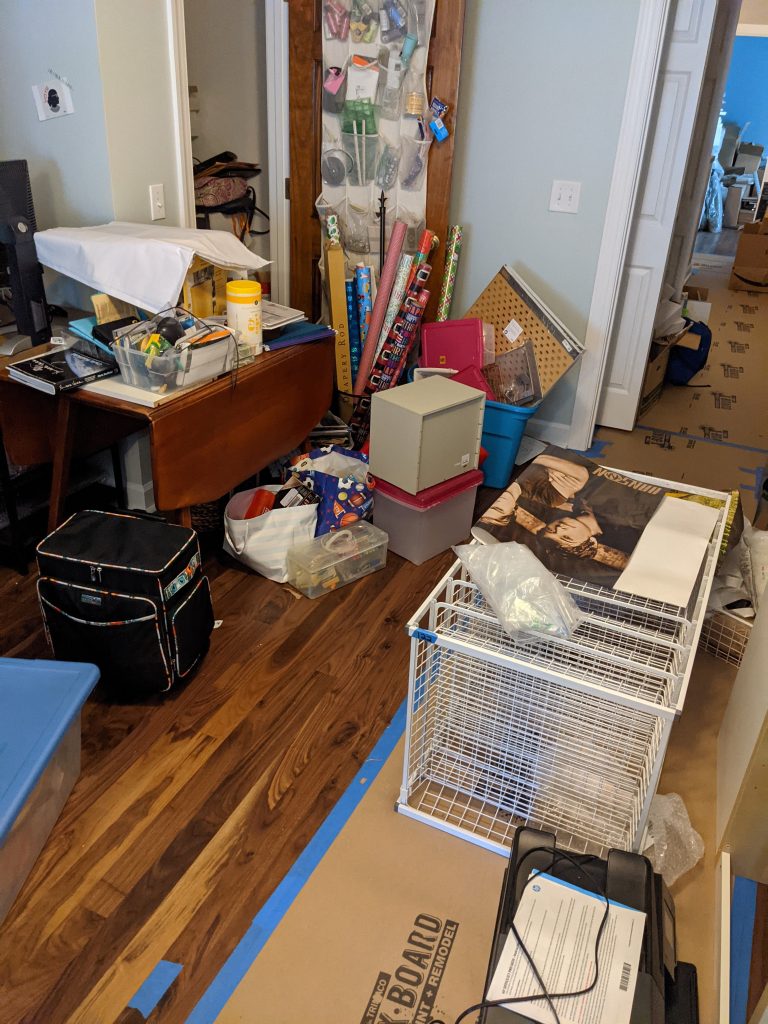
When we returned, the bonus room was so full of boxes, you could barely walk in. Between the multiple furniture pieces and about 60 boxes, floor space was really tight. I really wish that I had snapped a picture before I started unloading boxes.
Knowing I was going to be walking into a disaster and a blank slate, I asked for something for my birthday that I always wanted to do. I hired a professional organizer to help me transform my space. I was looking for a fresh start. I am not great at visual planning and I knew my room wasn’t set up in the most efficient way. I just couldn’t see it any way other than how it was. Plus, I am changing how my room works with more video and digital classes, so I needed to accommodate for the way my business is growing. And, I’ll be really honest, this room is a weird shape. In came Lela Burris of Organized-ish!
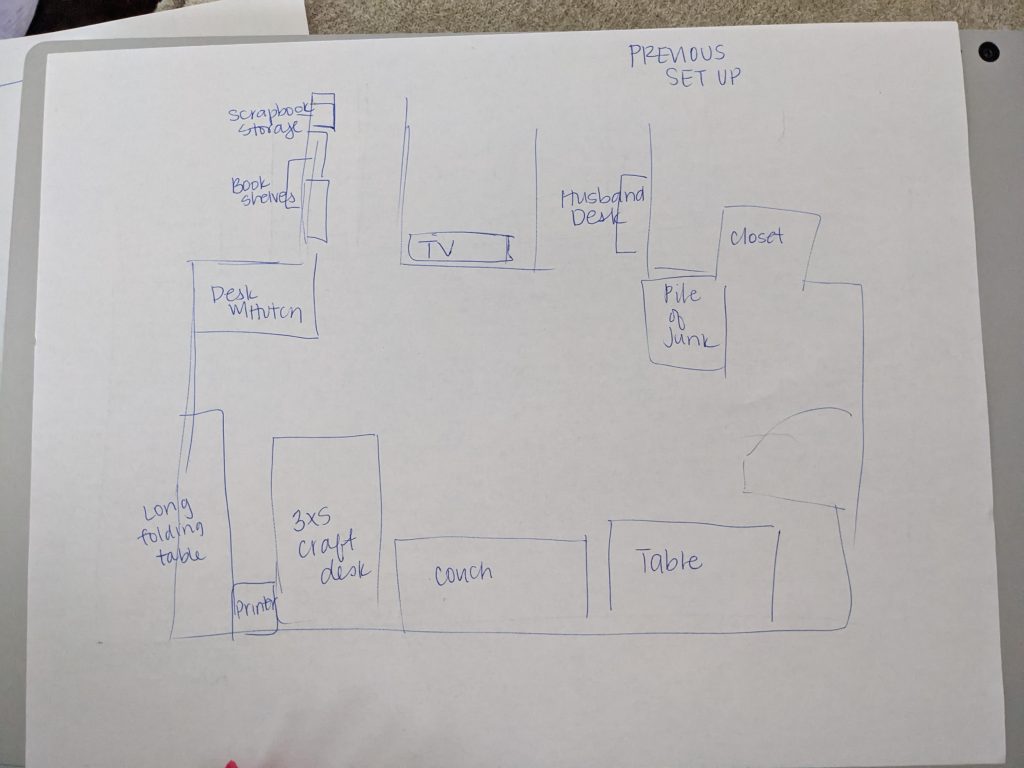
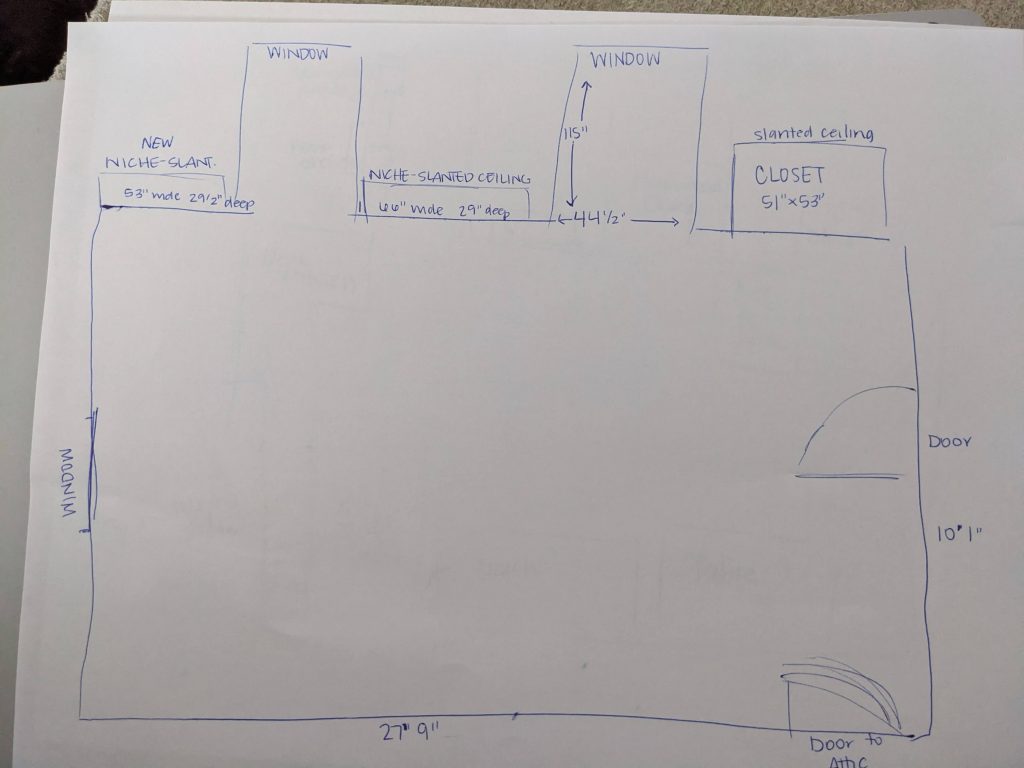
Before we get to how she changed my life, I will say that picking the right person was a really important piece of the decision for me. I knew that I wanted someone who was creative and crafty, as well as organized. I have a lot of supplies, part for fun and part for work, and having an organizer come in and say that I needed to get rid of it just wasn’t going to work for me. Plus, a crafter knows how the flow of crafting works and how to make the most of my spaces. Lela is also crafty and a brand representative for Cricut, so she gets it. Plus, she seemed super laid back and enthusiastic, which were traits I needed to have working with me while I changed everything. Before she came over, Lela and I had lots of conversations about the process and end goals. I sent Lela a list of my requests and hopes for the room, in the best case scenario, as well as some pictures I had from before the storm and new measurements. These are my sketches I sent over to her!
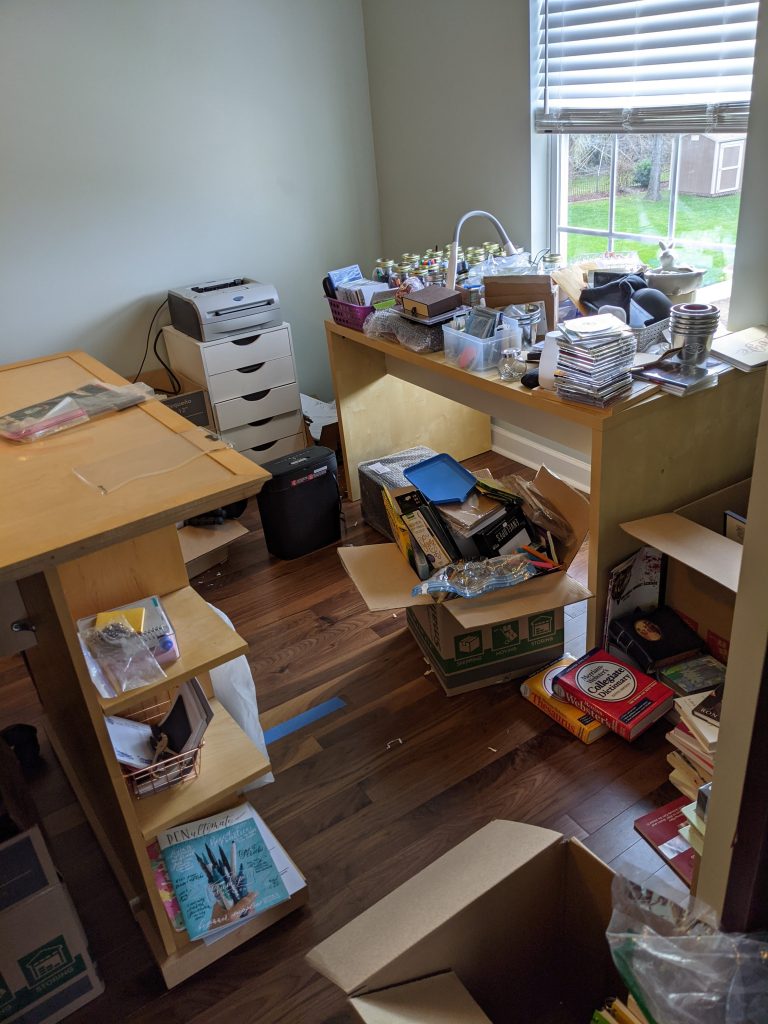
Before she arrived, I hustled by buns and had everything unpacked from its original packout box, sorted into piles and boxes of like things, and trashed a lot. From the bonus room, I have donated 4 boxes of stuff and thrown away probably 12 trash bags full of paper, old stuff, and non-recyclables, and probably 2 boxes of recyclables have gone out too. Needless to say, it was a huge disaster.
Lela came in and the first thing we did was move furniture. She had a loose plan, a whiteboard, a bag full of goodies, and the patience to move stuff so I could look at it! Bless her. We moved furniture and then moved it again. We adjusted shelves, we brainstormed where things would go, and got to work unpacking and unboxing and sorting all kinds of items. It was amazing how quickly it went with both of us working on it.
One of the things I loved about Lela is that I was a helper. She didn’t shoo me out of the room to “fix” the space. I loved being a part of the process, because I know where everything is! I made decisions about what I would use most on each shelf, and I could approve or veto suggestions as we went. Plus, it was another chance to clear out items I don’t use. When the whole thing was done, it really is just what I want and need. Now, were there moments when I would love a huge surprise, tv style? ABSOLUTELY! But, this was just perfect for me. Additionally, I learned so much as we went through… products to use or repurpose, how to hang them, suggestions for the best priced storage containers. Lela was full of tips and tricks as we worked through the space. I have most definitely used these tricks as I worked through the rest of my house.
After 5 hours and 15 minutes, it was *almost* complete! I had a few homework assignments, like hanging pictures and getting a few containers, but the bonus room looked amazing! Later that day, Lela sent me a list of suggestions, homework assignments, and some before and after pictures. (And, we used the last few minutes to go downstairs and deal with the kids play space!)
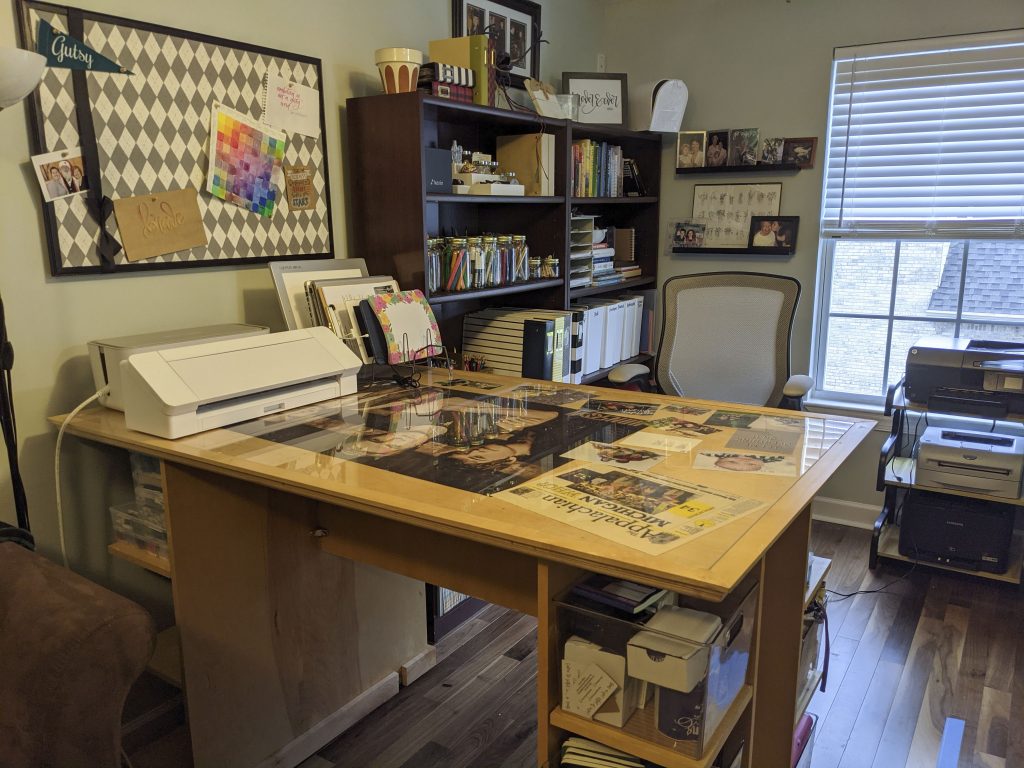
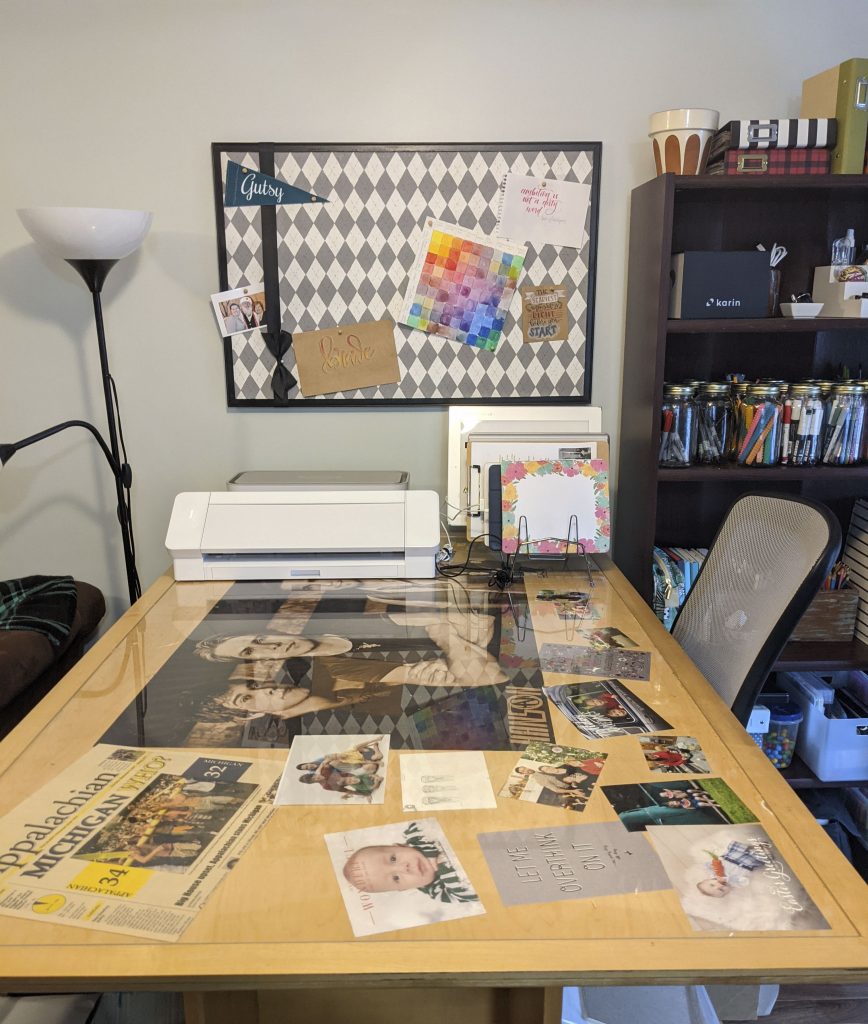
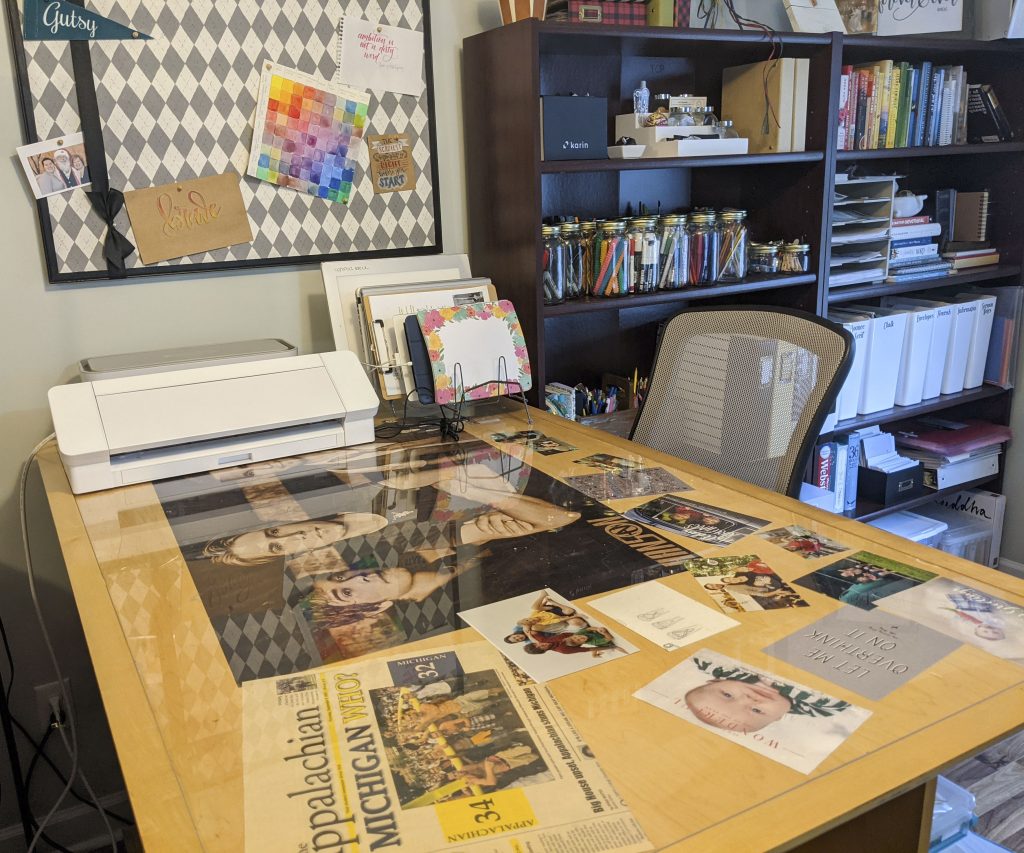
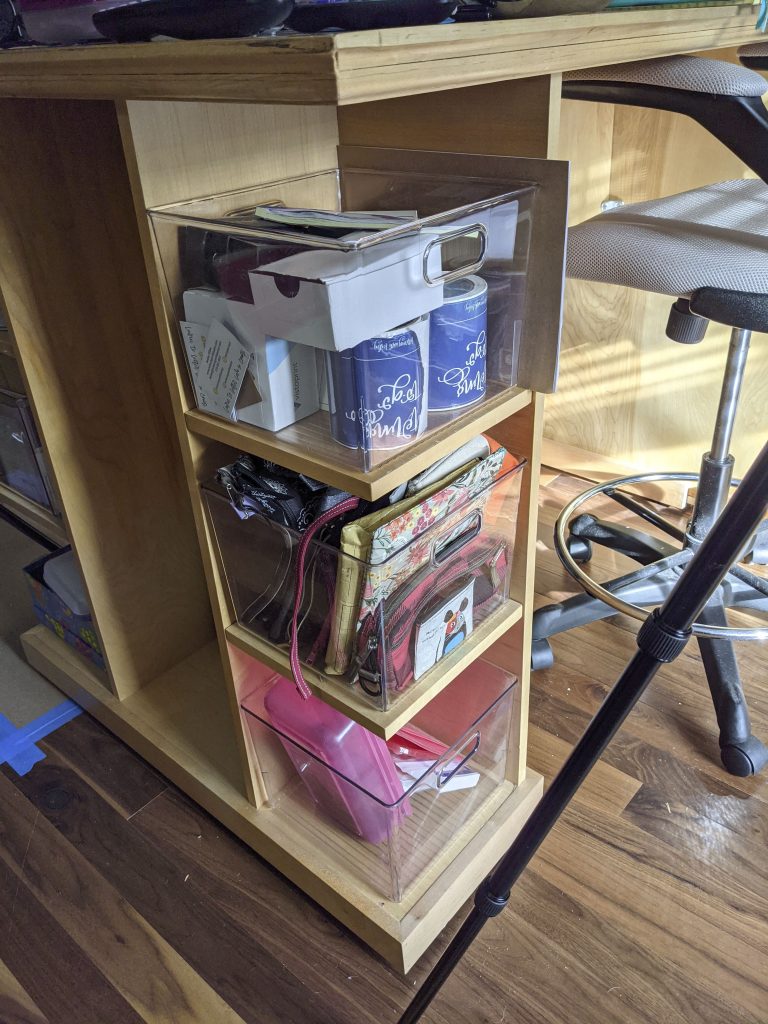
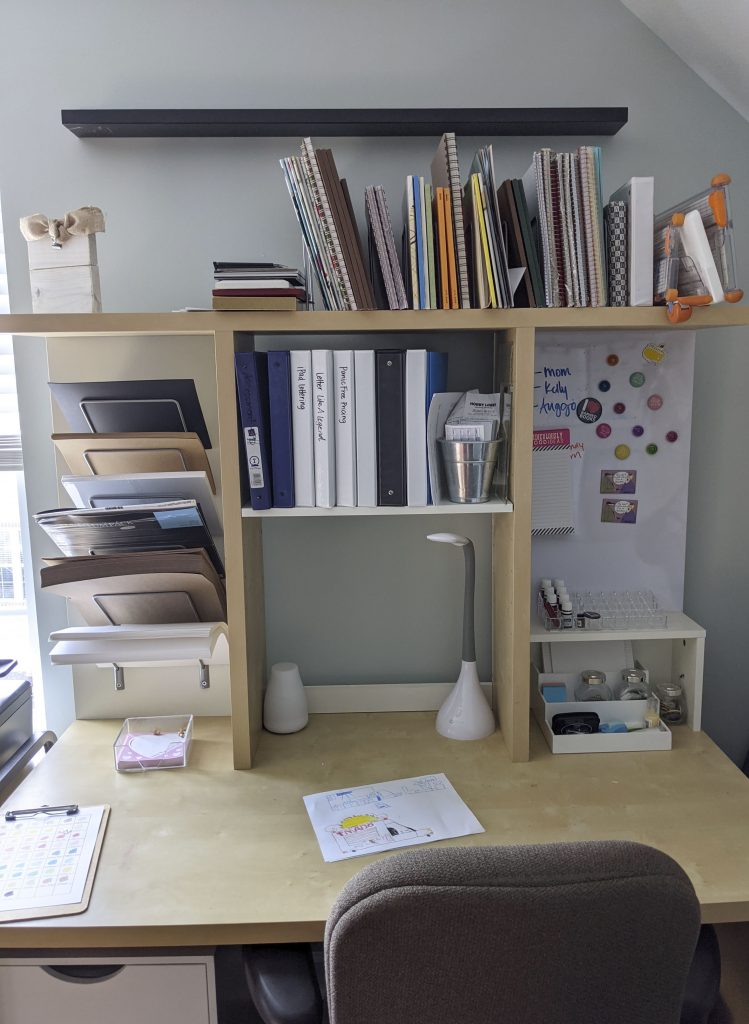
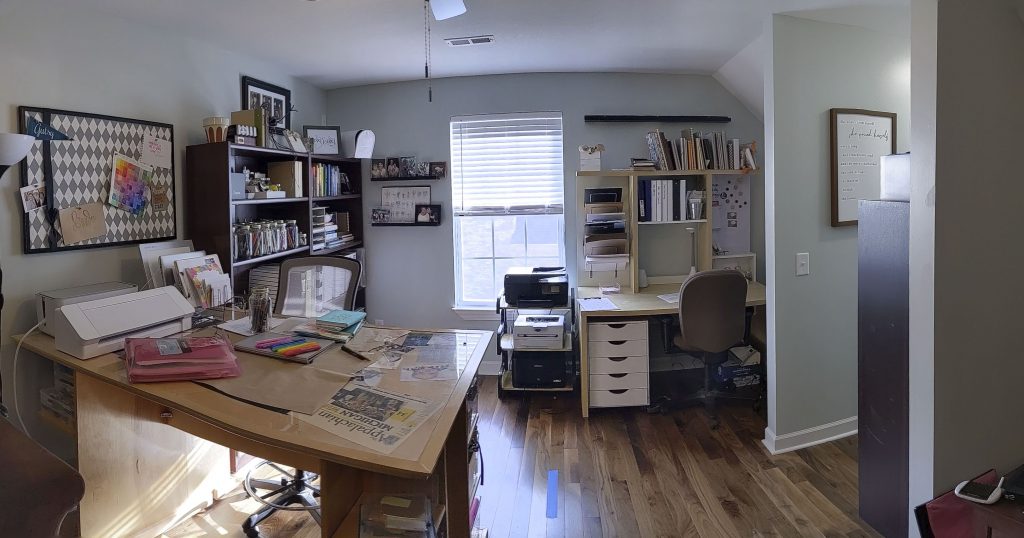
So, I want to walk you through my space, which is probably why you are here! First up is my gigantic desk that Brad made me so many years ago. I bought storage containers for the shelves that are the perfect size. Each one has a specific type of item in it! There are journals and notebooks, business branding items, zippered bags, stencils, and other small items that do not currently have a home. My goal is to keep the top of my table clear, because I am a stacker. Once a stack starts, I can’t seem to stop it and I am limiting what lives on top of the desk. On the far side is my new Cameo 4 (I got it for Christmas and it is such an upgrade from my old one… the Cameo 1), a cord organizer for my power strip and out of control cords, and an in-cabinet pot lid holder. In the sorter, I have my iPad, laptop, iPad, my mousepad, and a clipboard with my current projects. This is great for keeping just one charging station and all my pieces, parts, and chargers together. I can also tuck my mousepad in here when I am not using it to clear off the top of my desk space. My desk is on wheels so it can pull out to access the back shelves and create more usable side space.

Next up, are the bookshelves! I’ll do the left unit first, then the right. The top is a stadium shelf organizer from Totally Tiffany. There are some mini-albums in progress and my box of Karin markers. Below, I have rows and rows of mason jars filled with different types of pens. I like being able to see what is where and they are easy to access. Plus, I know what doesn’t get used because it migrates to the back of the shelf. The next shelf down has the “active journals” that I use on a regular basis – my reading journals, my gift logs, and drawing journal. Inside the green cactus bag are my very fancy colored pencils. I also have a two hole organizer that keeps colored pencils and regular pens and pencils that I can access as I am working and put up when I am done. Also on this shelf, scrapbooks in progress. Below it, I have some old scrapbooks from my grandmother and my wedding planning notebook, as well as my very essential stash of peanut M&M’s. In the two frosted containers, I have different materials that don’t fit nicely anywhere else. The first box is a bunch of different pen sets that have boxes, some pencils, and other drawing materials. The second box has watercolors in them. Both liquid and pan paints live in this container, as well as palates. The very bottom shelf has my ginormous stash of tracing paper that I bought to teach at a whole bunch of in person classes at trade shows last year (everyone laugh with me). I also keep my projector here for when I go back to teaching and traveling. In the container with the clear lid are my Tombow Dual Brush pens. Next to it, I have an empty travel pen bag and a soft sided CD holder with all my CD’s from my youth that I can’t bear to say Bye Bye Bye to just yet.

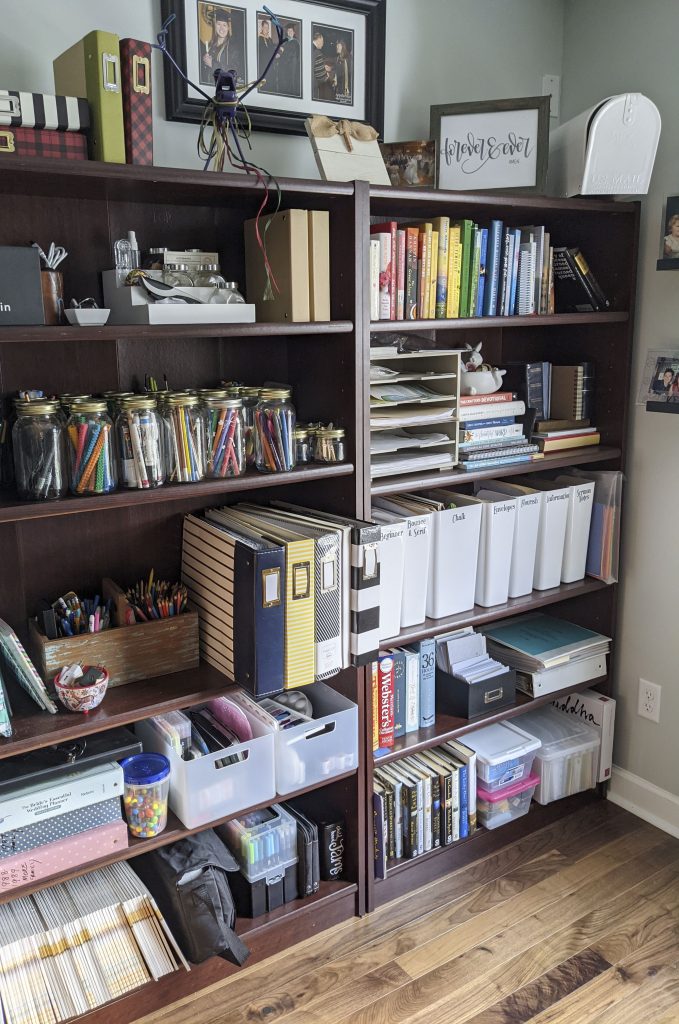
My second bookshelf has books to read up top, in rainbow order, because I did watch a lot of The Home Edit this summer. No shame. The next shelf has a paper sorter for keeping works in progress and packaged kits. Beside it are some of my creative books and a cute little rabbit holding washi tape. There are also some tiny photo albums that I have made over the years. The next row is all of my class kits and supplies. Previously, I used cardboard magazine holders from Ikea, but I did upgrade to hard plastic ones from Staples. They are now labeled and turned so I don’t have to see papers, folders, and loose pieces. This is where I keep printed workbooks for my classes, supply lists, and things I always take with me when I teach. Squeezed in on the side is my 8.5×11 inch colored cardstock in a paper holder. The next row down has my dictionary and thesaurus, because I am old school and my kids will learn how to look up words the hard way. I also have my journaling bibles here. In the black photo box is my overstock of envelopes and blank stationary that I use for demonstrations, tutorials, and custom work. (You can find my new series of Envelope Tutorials on my YouTube channel right here!) The notebooks are my graduate school portfolios (never forget!). The bottom row has my collection of Nicholas Sparks books. The containers have my chalk lettering supplies and my Doodle Pro 3-D Doodler. (Full disclosure: I am terrible at the Doodler.) The clear container is my greeting card sorter that has all kinds of cards for all the holidays and at the end is my Buddha board for relaxing lettering.
Over the top of my bookshelf, I keep my December Daily albums, a few pieces of lettered art, a favorite frog statue thing that was gifted to me year ago, and a mailbox. I also keep a clay pot. At one point it had a plant in it, but plants are not my jam and it deceased many years ago.
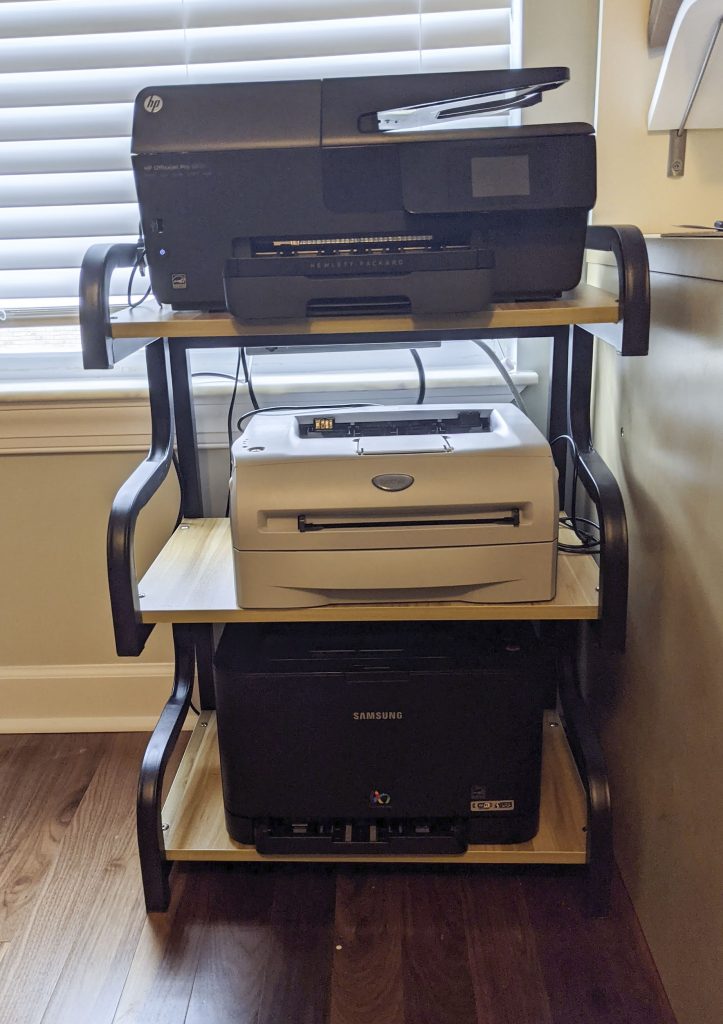
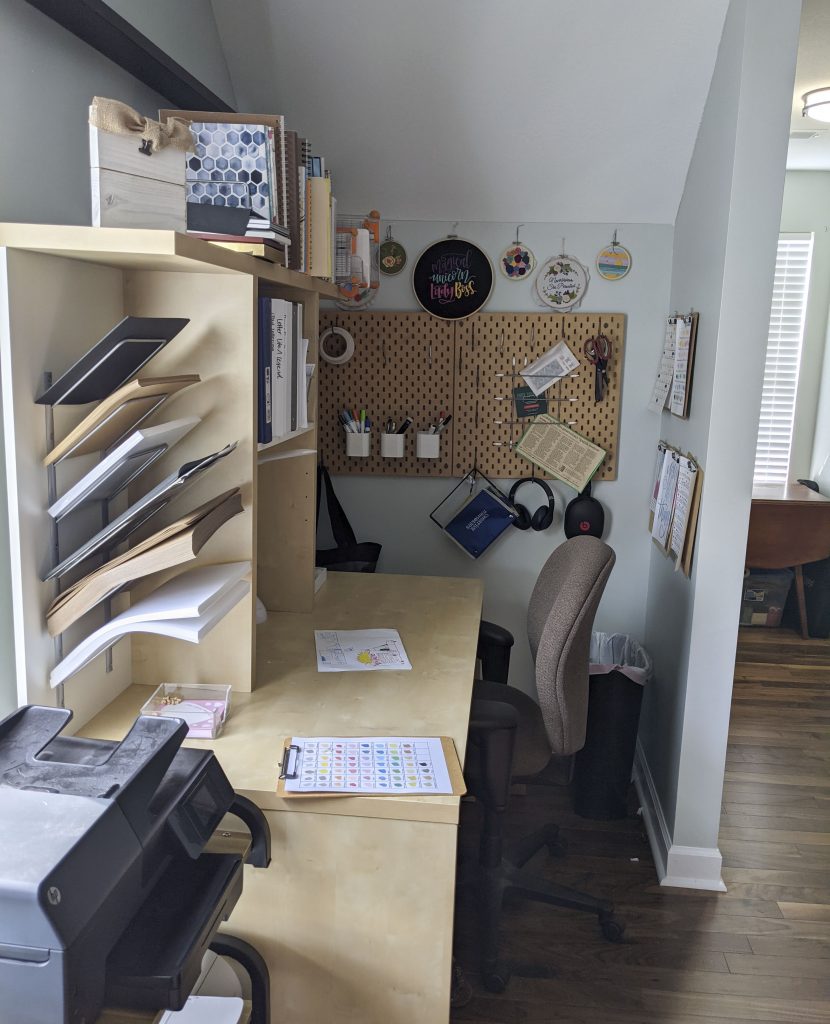
A new purchase for this room was is the tower for the printers. We were planning to spread them out, but it just makes the most sense to stack them up! All of these printers were here before or gifted to us over the summer. It is nice to have them all in one space and it takes up very little space in the room. On the back of the tower, I have a power strip Command strip velcroed on to eliminate as much cord chaos as possible.
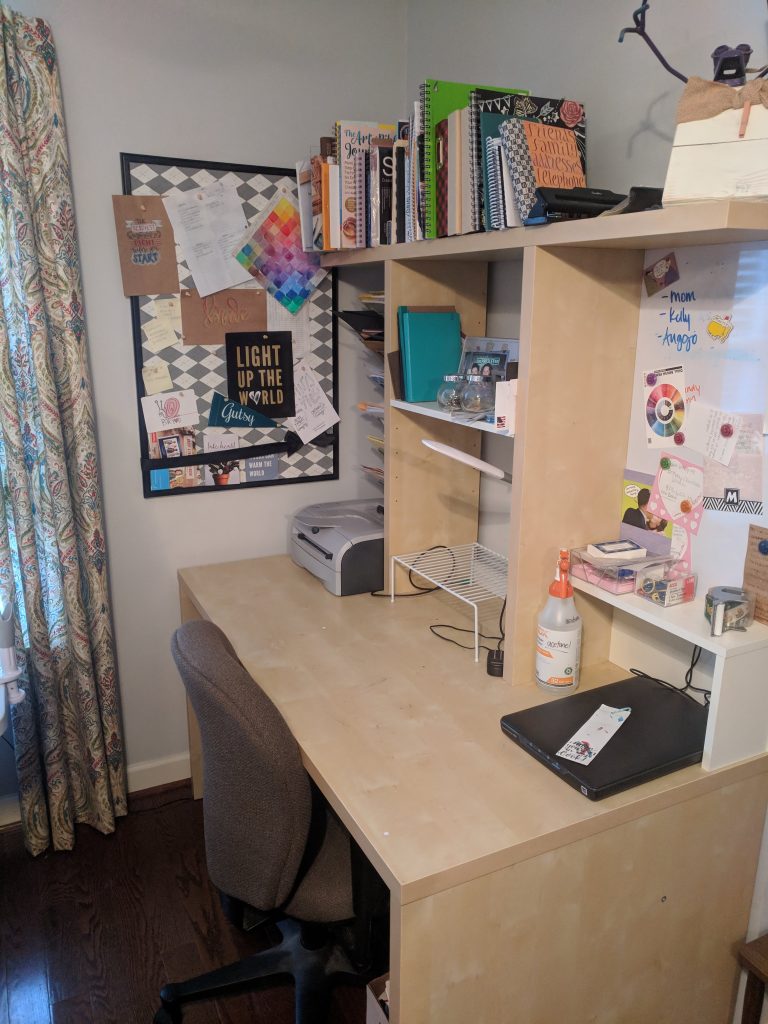
I also have a regular desk from my favorite home of flat pack furniture, Ikea! On the top of the hutch, sorted by type, I have a variety of papers and notebooks. This is where I keep my collection of mixed media paper pads, tracing pads, watercolor paper pads, and sketching notebooks. And, perhaps my favorite thing in the whole room? I love where the paper trimmers are stored now! They are also up on top of the hutch and it is awesome! They are too big to go in containers and take up so much space when laid on a table top, but I use them all the time. In this space, they are accessible, don’t take up valuable desk space, and are easy to access.
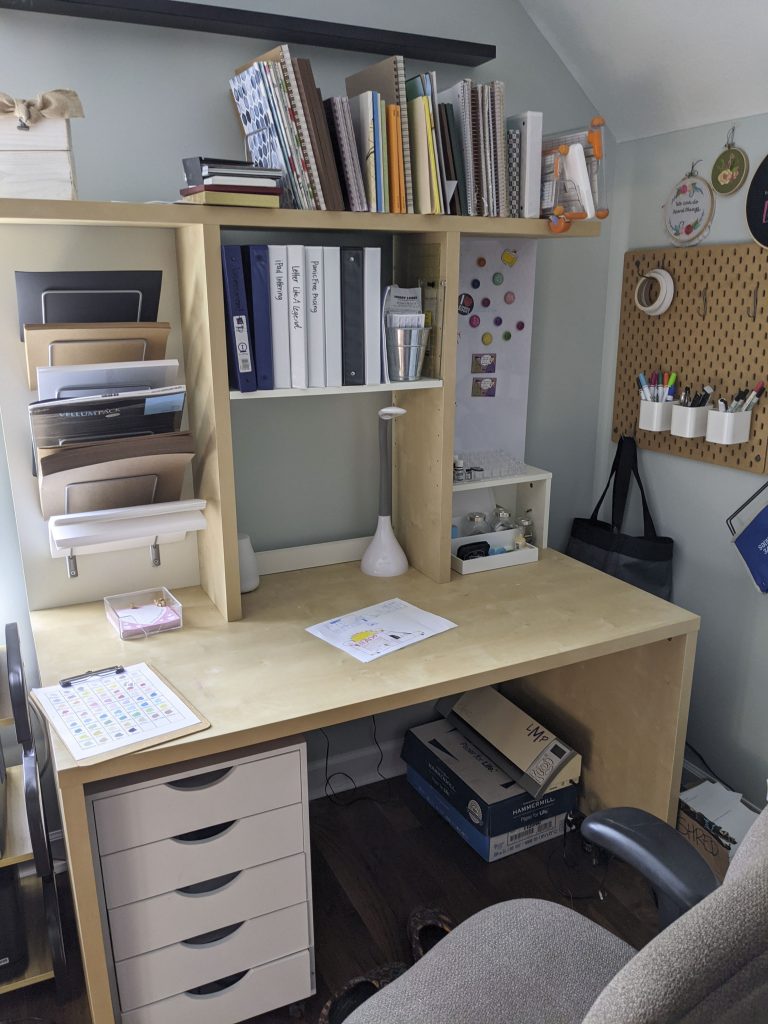
This desk also has paper sorters that I used to keep folders on. And, to be honest, it is where things went to die in my old space. Now, I am loving keeping my plain cardstock that I access all the time here… and in all my basic colors – black, white, and kraft in both 8.5×11 and 12×12 sizes. This was another one of Lela’s suggestions and I love it! I also have my OttLite on this desk, since it isn’t well lit in the corner, and the other side has a second Totally Tiffany stadium organizer with some little scrapbooking tools I use a lot. I also have some essential oils and a diffuser over here. Underneath the desk, I have a rolling paper organizer from Michael’s that has computer paper, notebook paper, and office supplies like rulers, staplers, and tape.
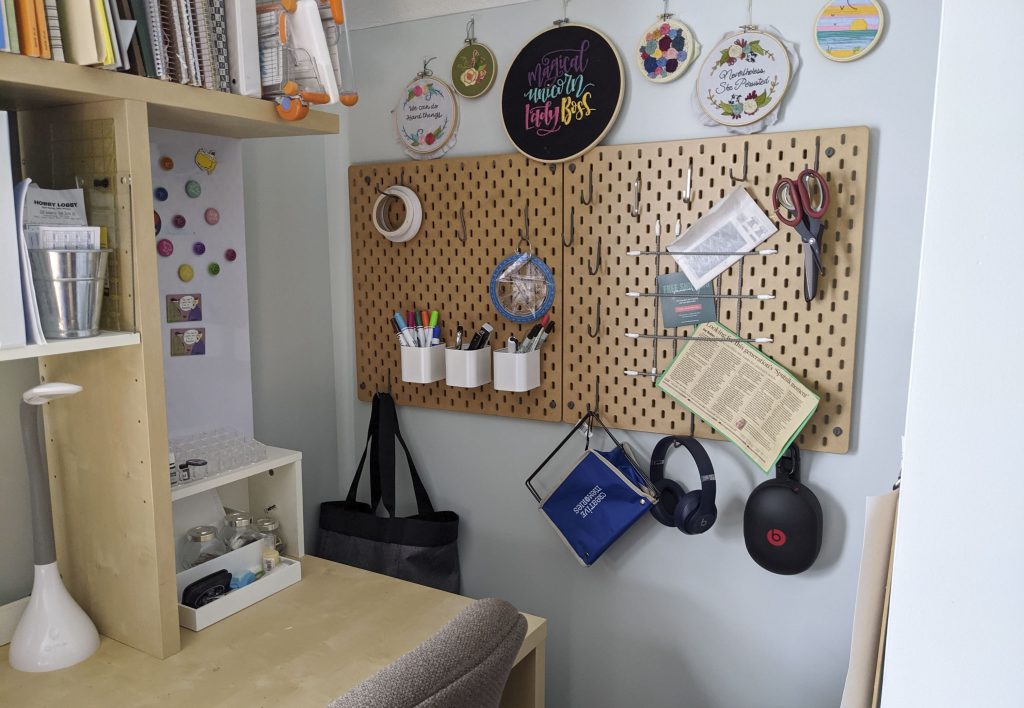
When we rebuilt this room, Brad had the idea to add this niche. I was hesitant at first, but love it now. On the back wall of the niche, I put up my new peg board from Ikea with some pieces and parts. I am still working on the boards organization, but it is a start. I think I need to order more pieces from Ikea… or convince my husband to go back to Ikea with me. Above the pegboard is my collection of embroidery samplers. Around the corner, I also hung up all my color charts for reference here. I like to keep them on clipboards so they can be adjusted, fixed, and changed easily. In this corner also has a large trashcan, because crafting, and a tiny shredder is beside the desk too.
This room also has narrow dormers that we affectionately call “The Tunnels of Love.” I keep one for my stuff and my husband puts his whole office in his. I have offered him space within the room, but he likes where he stays, so I will not second guess his decision to be cramped. (On a side note, he does not want my help unpacking or organizing his supplies. I think he is afraid of my new ninja organizing skills.) Previously, both bookshelves, my scrapbook stash, and lots of piles of things, lived inside the dormer. It made it inaccessible at best and a tripping hazard at all times. Not anymore!
![]()
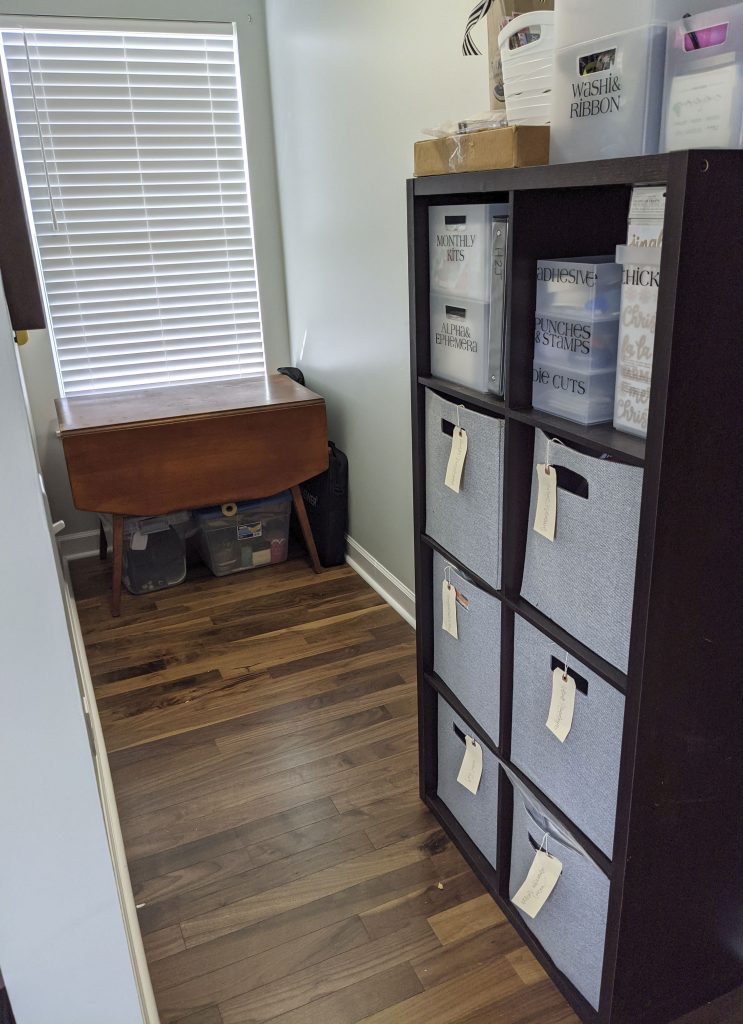
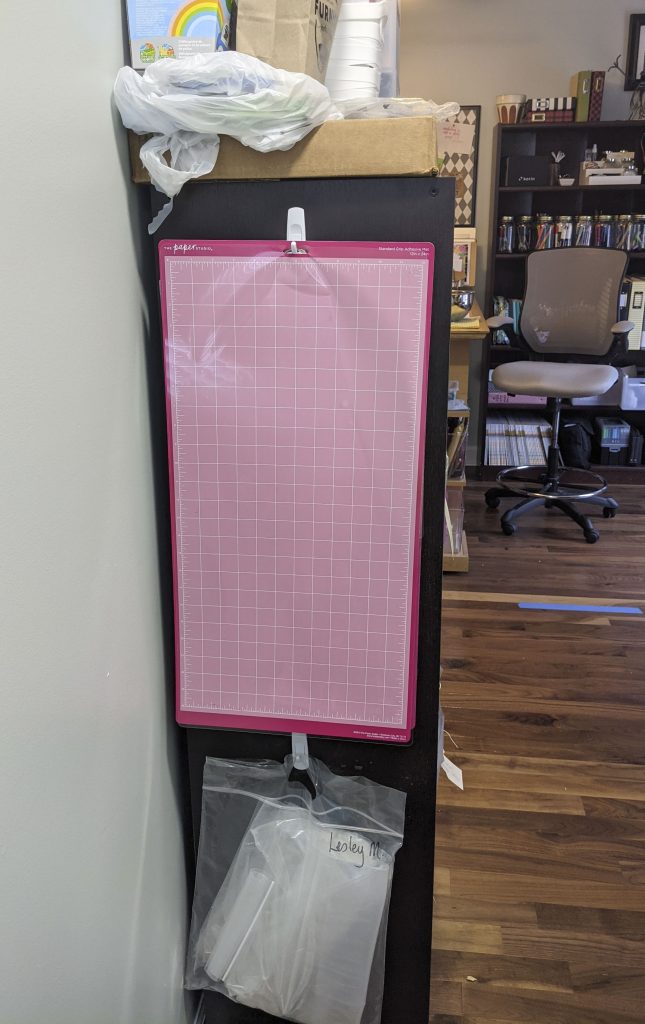
At the end of the dormer closest to the room is all my scrapbooking stuff. My paper is sorted into 6 categories (spring/easter, birthday/valentines, summer/travel, fall/Halloween, winter/Christmas, boy lines, and favorite lines – read Shimelle, Amy Tangerine, Paige Evans, etc). They fill out the bottom 6 holes of my 8 hole shelf that is like the Kallax. This is the Target equivalent with the Target threshold soft sided boxes. I hung two Command hooks on the side of this unit, facing away from the room. The top hook has my Silhouette cutting mats and the bottom hook holds extra class bags that I use to sort my scrapbook paper. Right now, I have Valentine’s Day goodies for my kids hidden on top too 🙂
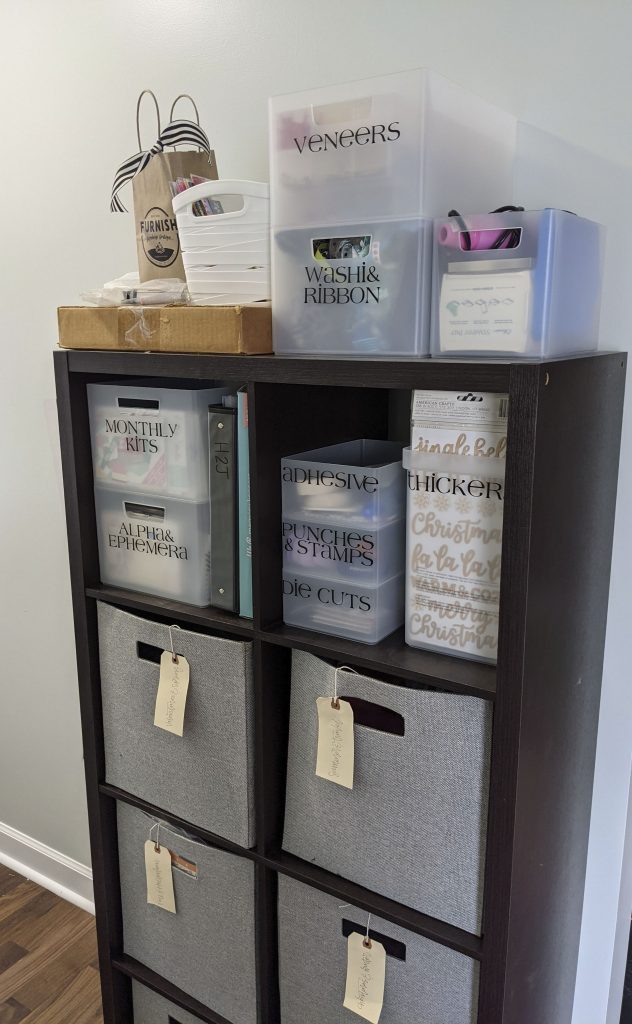
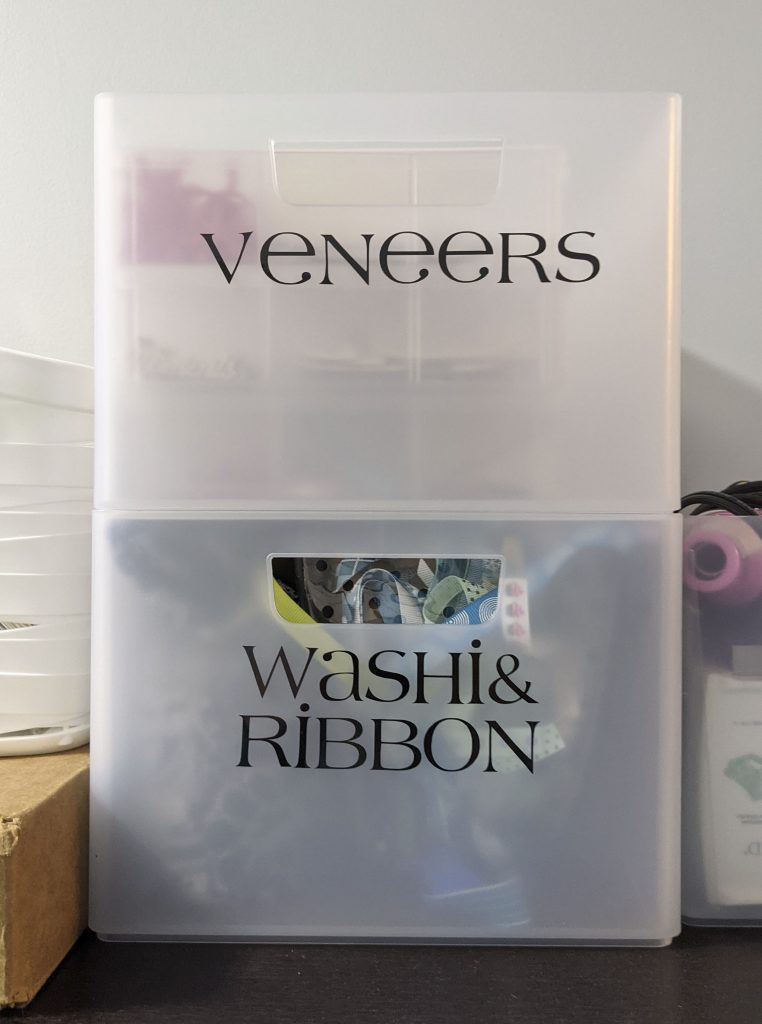
In the top two holes of the unit, I have extra page protectors and storage containers with embellishments and extras sorted. On top, I have veneers and washi tape, as well as a container with mini album page protectors. Everything is stored in a frosted container that matches, which really helps it look cohesive and not like a hoarder’s nest. I also labeled all these containers and it really helps me find and return things faster. Another bonus is that all of these frosted containers stack and nest when I can travel to crop again!
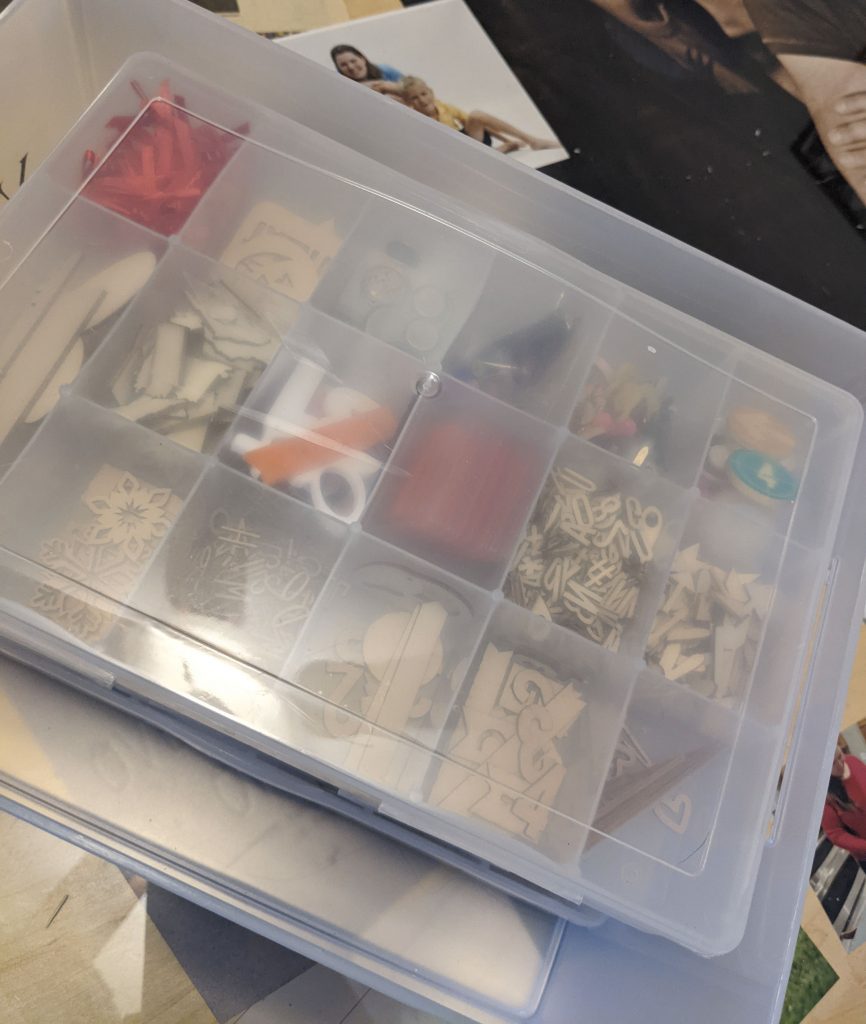
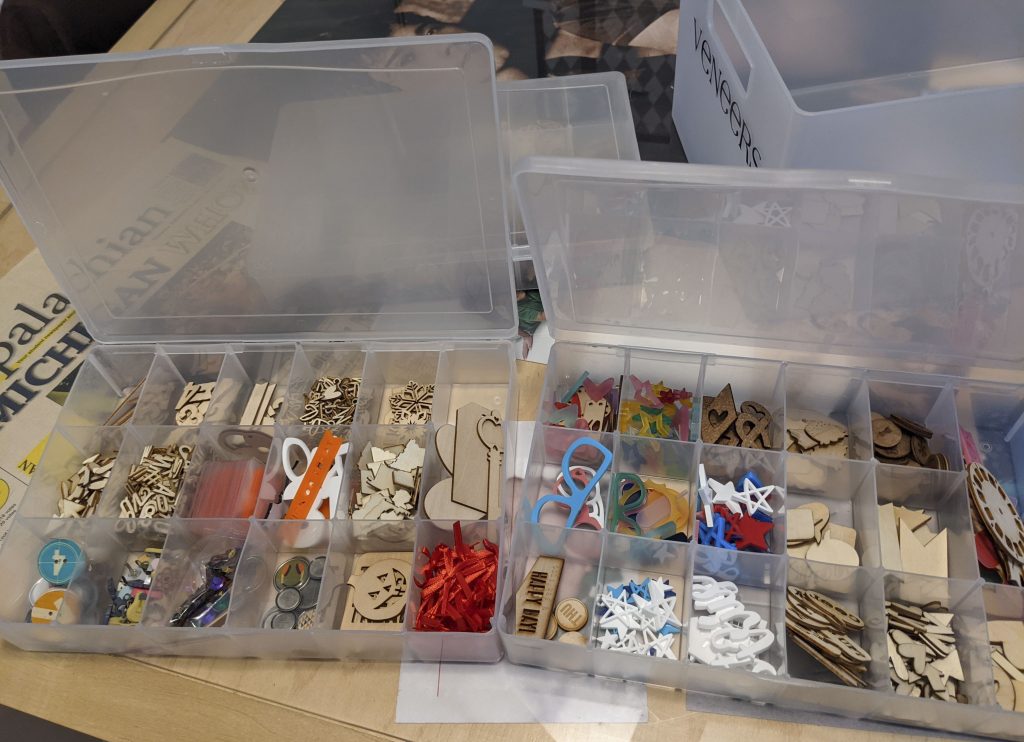
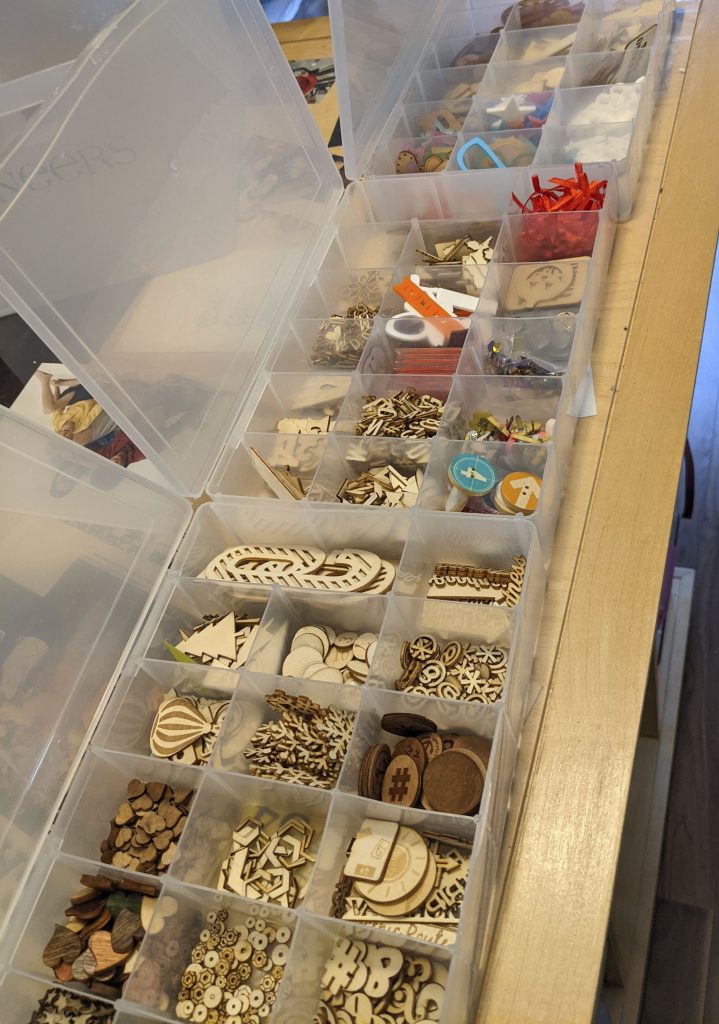
When I started this project, I changed how I sorted my veneers, which are one of my favorite embellishments. Previously, they were in a storage container that was shoebox size, in a mess of plastic baggies. I bought 3 (well, 2, because I underestimated the size of my collection, and then had to go get another one) bead organizers at Hobby Lobby and dropped the different types of veneers into different sections. I did add together some like items and was able to use the large section on the side for bigger pieces. I also added acrylic pieces, cork pieces, and some other bulky embellishments to the veneer boxes.
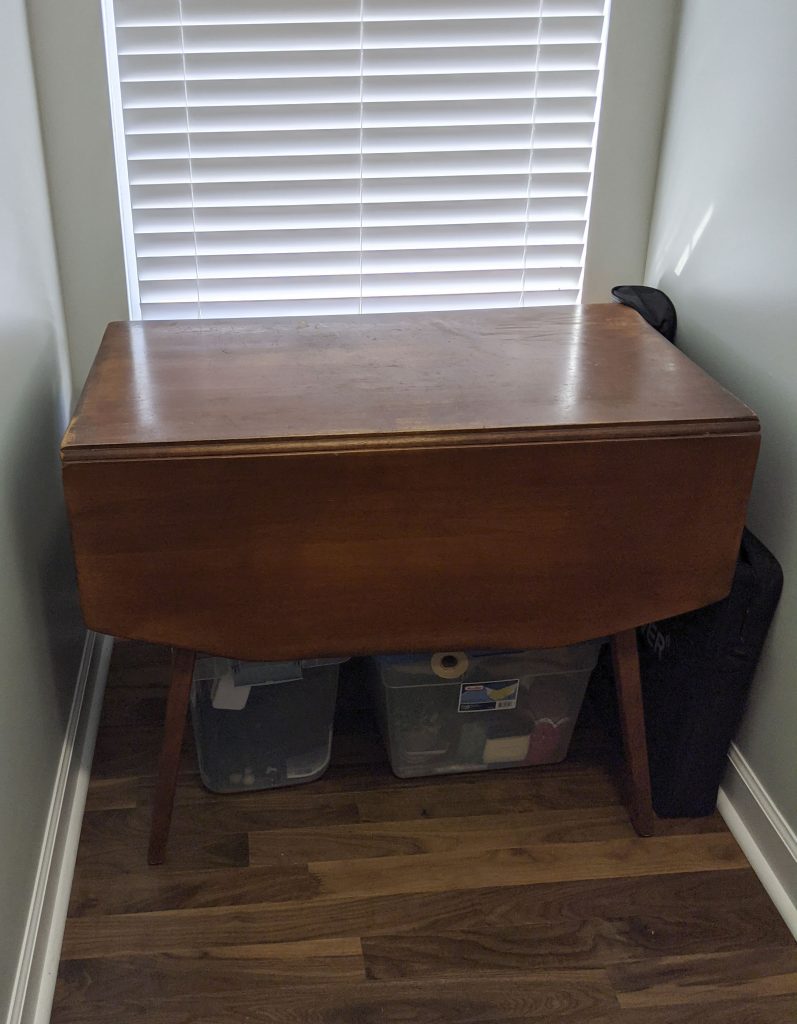
At the end of the dormer is an old drop leaf table. I am using this area to photograph my work since there is a large window at the end of the dormer I can use for natural light. Underneath the table are two different large organizing totes. One tote has all my photo props, like fabrics, office supplies, and ribbons. The other tote has extra video equipment, like lights, filters, microphones, and tabletop tripods. Tucked on the side is my ring light and tripods in storage bags.
Across the room, we added a door in the bonus room to access some attic space that wasn’t available previously and laid down some plywood that was serving as our temporary garage doors! I was able to move my large boxes of bulk supplies for classes and shipping into here. It is so nice to not have a bunch of storage boxes in the middle of the room to climb over all the time now!
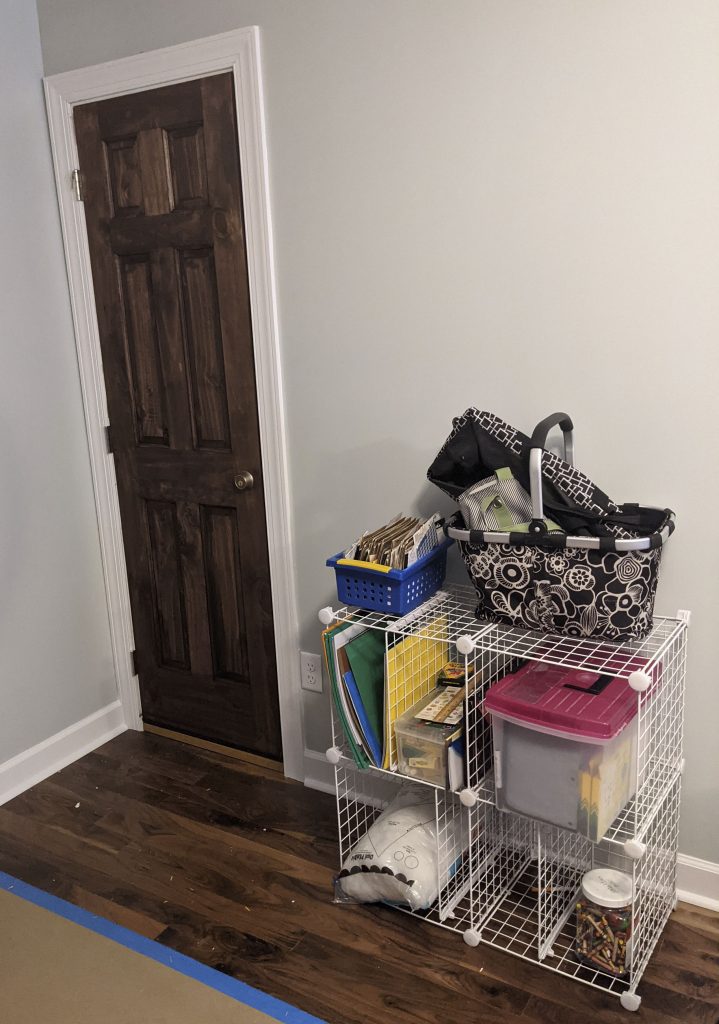
Next to the door is a small wire storage unit of my husband’s that I have been trying to get rid of for years. But, it works perfectly for the kid’s art things in this room. Now, my oldest can access supplies he can always use without having to ask permission. Plus, they are easy to put away as well. It is nice for him to have some independence in this room, so we can both create together, and he isn’t into my stuff. He likes to sit at the regular desk and color and draw while I work at the large table. The bags on the top are my traveling scrapbook bags!
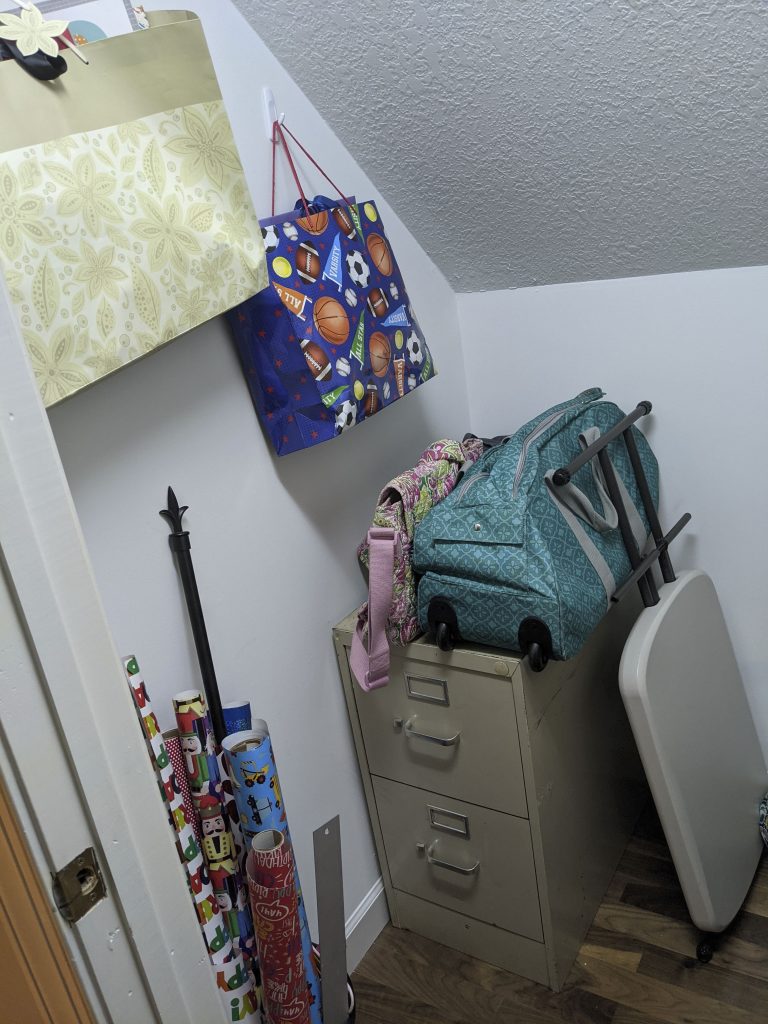
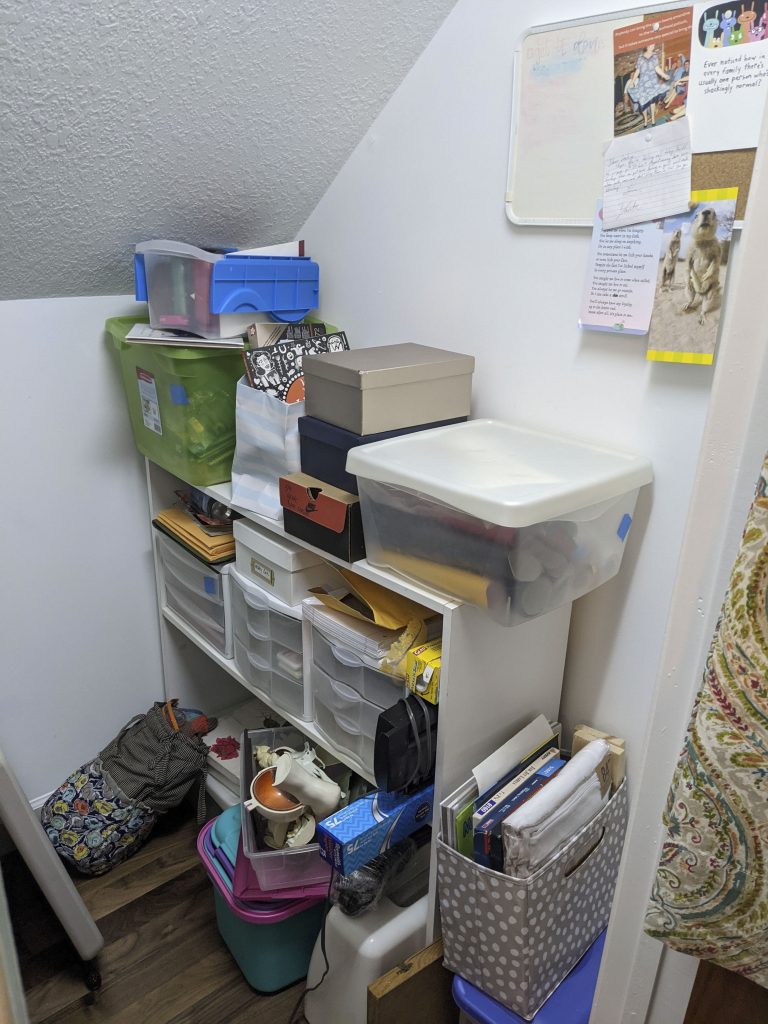
There is a small closet that has been organized too! It contains a small filing cabinet that I now use for *gasp* filing (it is a shocker!). I hung my gift bags on the wall, so they aren’t taking up floor space and used the bottom of the filing cabinet for small boxes and tissue paper. It looks much less junky in there and I can see the floor. I also have boxes for stationary and back up art supplies here, and my general gift box full of extra goodies. It needs a little fine tuning, but is so much better! On the door, I have a shoe organizer with lots of little random supplies, like magnets, pipe cleaners, and glue sticks… just bulky stuff that gets used regularly.
Having my room organized was an incredible experience! I highly recommend it to anyone and would for sure recommend Lela. My husband and I are thinking about having her come back to help with another troublesome space in our home. The systems we created are really easy to maintain and nothing is hard to do. And, now that it is organized, it is so much easier to just put up one or two things, instead of struggling with a constant mess. I feel like I am finally able to successfully model how to keep my playspace picked up for my kids and keep them accountable too when they are creating. It is easy to see the mess, because everything else is cleaned up. The experience has inspired me to change how I am doing things in other parts of my house and I am the proud owner of a revolving pile of storage containers that I am always switching around to find the perfect fit.
It has been about 6 weeks since Lela came and set me up and I am still able to maintain all the systems, improve a few things, and got all my homework done. Even as Christmas wrapping happened in the bonus room, it didn’t get destroyed and it was so easy to find my scissors! I think this is the most true testament to how effective the systems Lela helped me create work.
At the end of the day, it is so nice to go in my room and just create and not feel stressed out by all the stuff.
I hope you guys enjoy! Drop me a question about the craft room or my experience working with an organizer and I would love to answer them!